
Gutters: How They Fail, What Goes Wrong, and How to Keep Them Clear
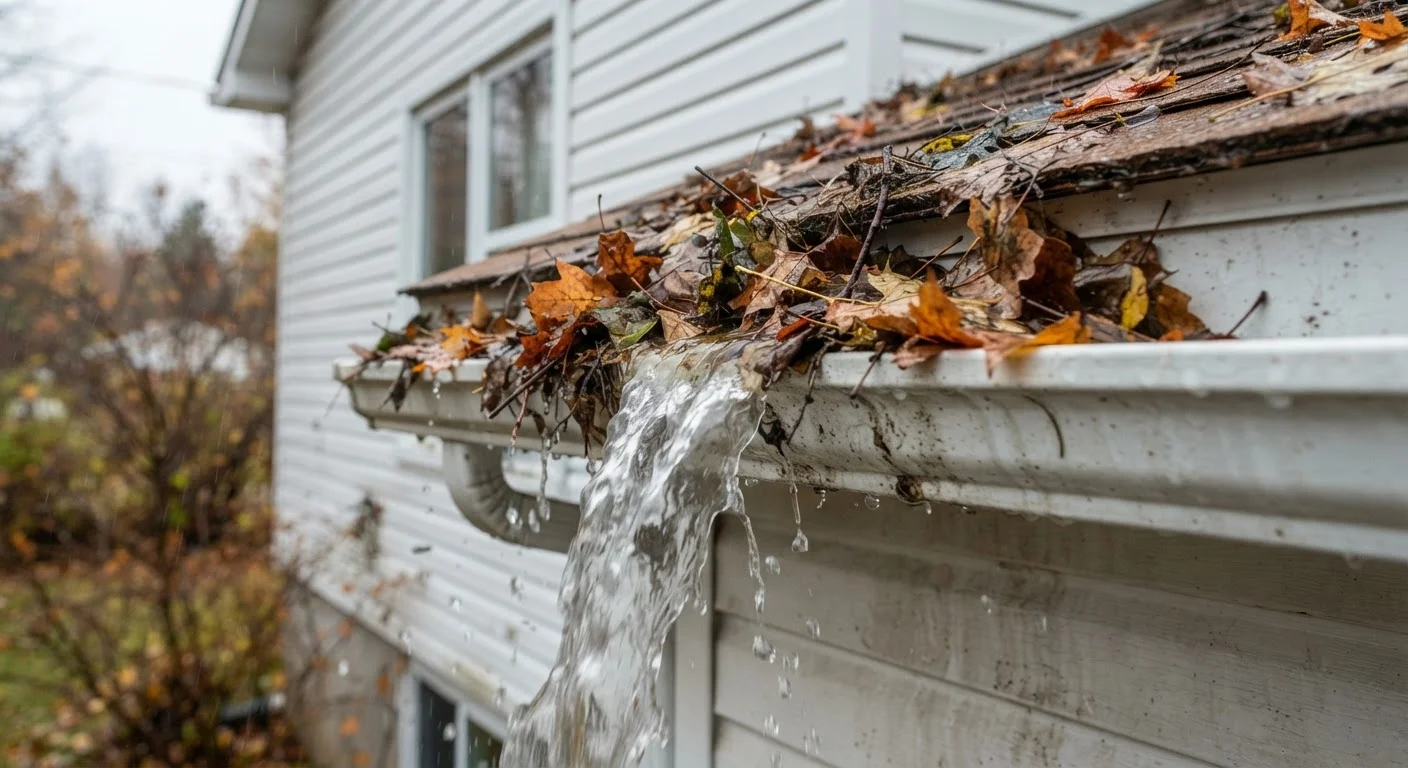
Photo credit: Glowwwatch.com
In this article
Clogged or damaged gutters can cause foundation issues, roof leaks, and siding rot. Learn how to inspect and maintain them properly.
Key Takeaways
- Gutters fail in predictable ways: clogs, sagging, improper pitch, and joint separation are the most common.
- Neglected gutters can lead to foundation damage, siding rot, and basement flooding.
- Most homeowners should clean gutters at least twice a year — spring and fall.
- A simple inspection can catch most problems before they become expensive repairs.
- Downspout discharge should direct water at least 4–6 feet away from your foundation.
Why Gutters Matter More Than Most Homeowners Realize
Gutters have one job: intercept rainwater shedding off your roof and channel it safely away from your home's foundation, siding, and landscaping. When they do that job well, they're invisible. When they fail, the consequences ripple through several systems at once — and repair costs climb fast.
Water that overflows or leaks from gutters can saturate soil against the foundation, increasing hydrostatic pressure that leads to cracks and basement seepage. It can soak behind siding, feeding the wood rot and mold growth described in detail in our article on how small water leaks escalate into structural problems. It can also back up under roof shingles at the eaves, causing interior ceiling damage.
The encouraging reality is that most gutter failures are preventable. The four most common failure modes — clogs, sagging, separation at joints, and incorrect pitch — all respond to routine inspection and cleaning. If you're in your first year of homeownership, gutter maintenance is one of the foundational habits covered in our first-year homeowner inspection guide.
Overflowing Gutters Threaten Your Foundation
When gutters can't channel water away, it spills directly against the foundation — the leading cause of basement water intrusion and long-term structural damage. Even one season of neglect during heavy rainfall can allow water to saturate the soil around footings. See our guide to drainage warning signs to understand what to watch for at ground level.
What You'll Need
Gutter cleaning doesn't require specialized equipment, but having the right tools makes the job safer and faster. Gather everything before you climb.
What you will need
Extension ladder
Provides safe, stable access to gutters on single- and two-story homes.
Gutter scoop or garden trowel
Removes packed leaf debris and sediment from the gutter channel efficiently.
Garden hose with adjustable nozzle
Flushes remaining fine debris and tests that water flows freely through downspouts.
Plumber's snake or drain auger
Clears a blocked downspout that won't flush free with water pressure alone.
Gutter sealant (silicone or gutter-specific)
Seals small cracks or leaking joints between gutter sections.
Work gloves and safety glasses
Protects hands from sharp metal edges and eyes from debris during cleaning.
Step-by-Step: Inspecting and Cleaning Your Gutters
Inspect from the ground first
Before climbing a ladder, walk the perimeter of your home and look up at the gutters. You're checking for visible sagging, sections that have pulled away from the fascia board, joints that have separated, and any areas where the gutter channel has visibly bent or dented. Also note any staining on siding directly below a gutter run — this often signals a consistent overflow point.
Set up your ladder safely
Position your ladder on firm, level ground. Never lean it against the gutter itself — the channel isn't designed to bear that load and can bend or detach. Use a ladder stabilizer (also called a stand-off) to brace against the fascia or siding instead. Always maintain three points of contact when climbing and never overreach — move the ladder rather than stretching sideways.
Remove debris by hand
Wearing gloves, use a gutter scoop or trowel to remove leaves, seed pods, shingle grit, and any compacted material. Work from the end farthest from the downspout toward the downspout opening. Deposit debris into a bucket hanging from the ladder or onto a tarp below — avoid pushing debris into the downspout, which can create a deeper clog.
Flush with a garden hose
Starting at the end farthest from the downspout, run your hose at full pressure along the gutter channel toward the downspout opening. This flushes fine sediment and lets you observe the flow speed. Water should move steadily toward the downspout and drain quickly. Sluggish drainage indicates either a partial downspout clog or an incorrect pitch (slope) in the gutter run.
Clear blocked downspouts
If water backs up at the downspout during flushing, try running the hose directly into the downspout opening from the top with full pressure. If that doesn't free the clog, disconnect the downspout at the elbow near ground level (most are held by screws or friction-fit) and work a plumber's snake upward from the bottom to break up the blockage. Reconnect securely before finishing.
Check and correct gutter pitch
Gutters should slope gently toward the downspout — approximately a quarter inch of drop for every 10 feet of run. If a section is level or sloping the wrong way, water will pool and eventually cause rust, rot in wood fascia, and mosquito breeding. Look for low spots where standing water stains the gutter bottom. Re-pitching usually means repositioning the gutter hangers (the brackets that attach the gutter to the fascia).
Seal cracks and leaking joints
Dry the interior of the gutter with a cloth or allow it to dry fully before applying any sealant. Apply a gutter-specific or exterior-grade silicone sealant to hairline cracks and to the inside of any joints where sections meet. Smooth it with your finger to press it into the seam. Most sealants need several hours to cure before being exposed to rain — check the product's instructions for timing.
Clean Twice a Year as a Minimum
For most US climates, cleaning gutters in late spring (after tree seeds and blossoms fall) and late fall (after leaves drop) covers the main debris cycles. Homes surrounded by pine trees may need a third cleaning, as pine needles shed year-round and mat together quickly. Building this into your seasonal routine prevents the compounding neglect that leads to expensive repairs.
Keeping Gutters Clear Between Cleanings
Gutter guards — mesh screens, micro-mesh inserts, or reverse-curve covers — can meaningfully reduce how often gutters need cleaning, though no system eliminates maintenance entirely. Fine debris like shingle grit and seed particles still accumulate over time, and guards themselves need periodic inspection.
Extending your downspout discharge is one of the highest-return maintenance steps you can take. Splash blocks and flexible extensions are inexpensive and direct water well away from the foundation. Aim for a minimum of 4–6 feet of clearance from the house. For a fuller picture of how ground-level drainage works alongside your gutters, see our guide to home drainage warning signs.
Finally, trim any tree branches overhanging your roofline. Overhanging limbs deposit leaves directly into gutters, accelerate shingle wear, and create paths for pests. It's one of those small preventive steps — like the maintenance misconceptions explored in our article on common home maintenance myths — that saves considerably more than it costs.
Don't Ignore Fascia Board Damage
The fascia board — the trim piece your gutters attach to — is made of wood on most homes, and persistent gutter overflow or joint leaks will rot it from behind. A soft, spongy fascia can't support gutters properly, and replacing it typically requires a contractor. Catch it early by pressing firmly on the fascia with your thumb during any ladder inspection.

Author
Home & Garden Editorial Team
Home & Garden Editorial Team is the collective byline for our editorial team and contributor network. Articles published under this byline or an editorial pen name are researched, written, and reviewed according to our editorial standards for clarity, consistency, and independence before publication.
View all articles →