
The Home Cook's Guide to Heat Zones and Burner Control
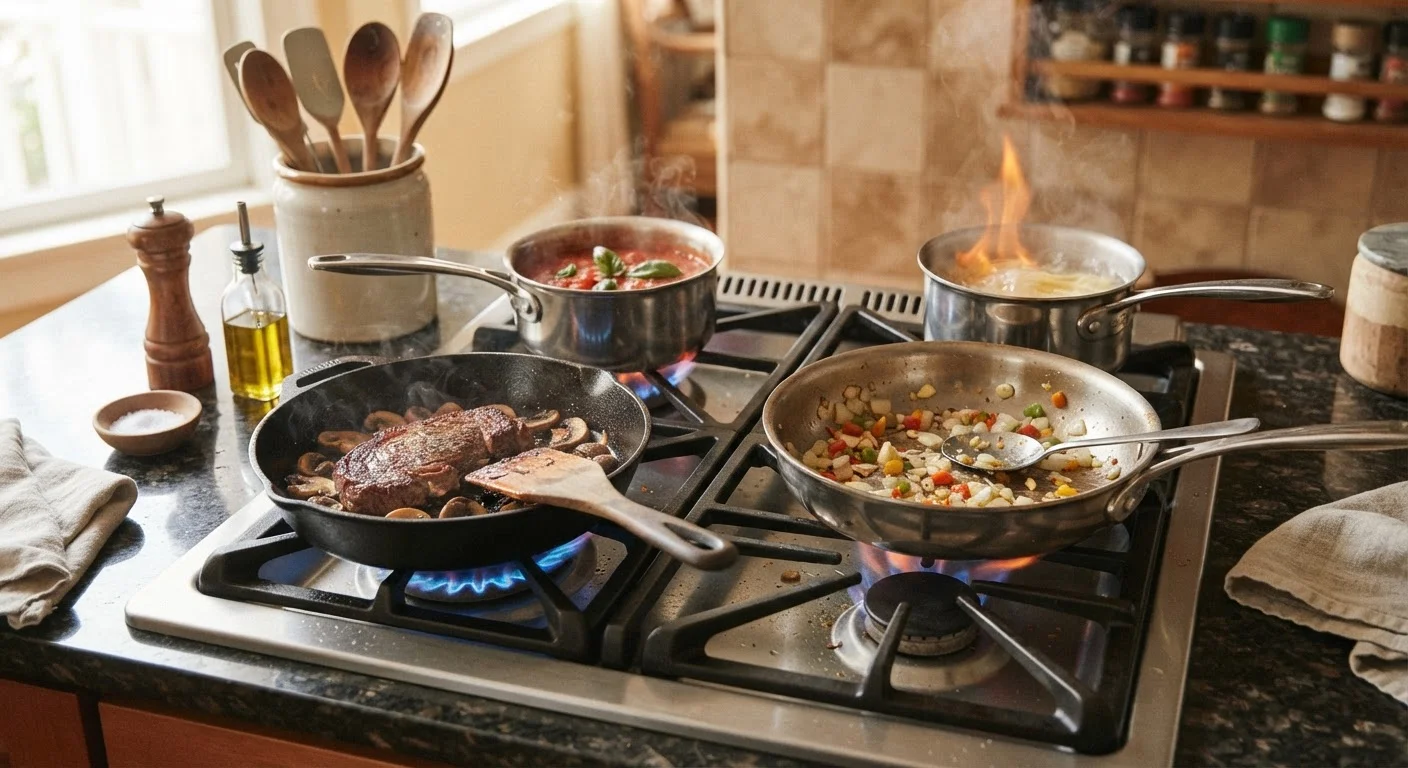
Photo credit: Glowwwatch.com
In this article
Understanding how heat moves through your cookware — and how to control it — is the foundation of consistent, repeatable results at home.
Key Takeaways
- Heat zones on your stovetop let you cook different components simultaneously at the right temperature.
- Cookware material dramatically affects how quickly and evenly heat spreads across the cooking surface.
- Visual and auditory cues from your pan are reliable guides to adjusting burner intensity.
- Most home cooks use too-high heat — lower and slower produces more consistent, forgiving results.
- Matching the right heat level to each cooking task is a learnable, repeatable skill.
Why Heat Control Is the Real Cooking Skill
A recipe can tell you to cook something over medium heat, but it cannot tell you what medium heat actually means on your stove. Every burner, every pan, and every kitchen is slightly different — which is why heat control is the foundation skill that makes everything else work. Once you understand how heat behaves, you stop relying on arbitrary dial positions and start trusting what you observe.
This is closely tied to something our guide on pan temperature covers in depth: the temperature of your pan at the moment food enters it shapes the entire outcome — crust, texture, moisture, color. Getting that moment right starts with knowing your heat source.
Preheat your pan before adding any fat or food. A properly preheated pan creates an even heat surface that prevents sticking and promotes better browning.
Fat added to a cold pan gets absorbed unevenly, and food added before the surface is ready will steam rather than sear, losing the texture and color you are aiming for.
When in doubt, start lower than you think you need and adjust up. It is much easier to add heat than to rescue overcooked or scorched food.
Professional cooks frequently cook at medium rather than high heat — the difference shows up in control, not speed. Lower heat gives you more time to respond to what the pan is telling you.
Understanding Heat Zones on Your Stovetop
Professional kitchens organize the range into distinct heat zones — areas held at different temperatures to handle different tasks at the same time. Home cooks can apply the same logic, even on a four-burner stove.
- High heat zone: One burner set to high for boiling water, searing proteins, or stir-frying. Reserve this for tasks that need rapid, intense heat for a short time.
- Medium heat zone: One burner at medium for sautéing vegetables, cooking eggs, or building a sauce. This is your workhorse setting for most everyday cooking.
- Low heat zone: One burner on low for keeping finished dishes warm, melting butter gently, or holding a simmer without scorching.
- Off zone: A cold burner used as a staging surface for resting pans or holding lids.
Thinking in zones rather than a single active burner lets you orchestrate multiple components simultaneously without chaos. It also reduces the temptation to crowd tasks onto one spot at the wrong temperature.
~70%
Home cooks who report burning food regularly
Surveys of home cooking habits consistently show that excess heat — not insufficient heat — is the most common cause of stovetop mistakes among non-professional cooks.
3–5 min
Recommended preheat time for cast iron
Culinary educators widely recommend allowing cast iron pans to preheat on medium heat for several minutes before adding oil or food, due to the material's slow heat absorption rate.
How Different Cookware Responds to Heat
Your burner setting is only half the equation. The pan itself changes how heat is delivered to food. Understanding this helps you predict results rather than react to them.
- Cast Iron
- Heats slowly and unevenly at first, but retains heat exceptionally well once hot. Ideal for searing and baking. Requires a longer preheat — at least 3–5 minutes on medium before cooking.
- Stainless Steel
- Heats quickly and responsively. When you turn the burner down, the pan follows almost immediately. Great for sauces and sautéing, but prone to sticking if not preheated properly with fat.
- Nonstick (PTFE-coated)
- Should never be used on high heat. Medium and medium-low are the safe and effective range for these pans. High heat degrades the coating over time.
- Carbon Steel
- Behaves like cast iron but heats faster and is lighter. Develops a natural seasoning with use. Popular in professional kitchens for its versatility and responsiveness.
Matching pan material to the job — and adjusting your burner accordingly — is a habit that pays off every time you cook.
Reading the Signs: What Your Pan Is Telling You
You don't need a thermometer to know whether your pan is at the right temperature. Your senses are reliable tools when you know what to look and listen for.
- The water droplet test (Leidenfrost effect): Flick a few drops of water into a preheated dry pan. If they skitter and evaporate slowly, the pan is warm but not yet ready. If they form tight, fast-moving balls that bounce and evaporate in seconds, the pan is properly hot.
- Sound: Food placed in a properly heated pan with fat should sizzle immediately and consistently. A weak hiss means the pan is too cool. Violent, spitting crackle means it is too hot.
- Smoke: A light shimmer from the fat is normal. Visible smoke means the fat has exceeded its smoke point — the burner is too high, or the pan has been preheating too long.
- Color of the fat: Butter foams initially as water evaporates. When the foam subsides and the butter begins to turn golden, it is near its smoke point. That is the moment to add food — or reduce heat immediately.
These cues apply regardless of what recipe you are following. Building the habit of reading them is what separates instinctive cooks from recipe-dependent ones.
Practical Burner Control by Cooking Task
Rather than guessing at dial positions, match your heat level to the job being done.
| Task | Recommended Heat | Key Indicator |
|---|---|---|
| Boiling water or pasta | High | Rolling, vigorous boil |
| Searing meat or fish | Medium-high to high | Immediate, loud sizzle on contact |
| Sautéing vegetables | Medium to medium-high | Steady sizzle, occasional browning |
| Cooking eggs | Low to medium-low | Gentle set, no browning on edges |
| Simmering sauces or soups | Low | Occasional bubble, not a rolling boil |
| Melting chocolate or butter | Very low or indirect heat | Slow melt, no browning or separation |
Once you've cooked the main protein or vegetable, lower the heat to finish the dish. Many home cooks keep the heat high throughout, which overcooks delicate components and burns fond (the flavorful browned bits on the pan bottom) before it can be used in a sauce.
For a broader look at how heat method — not just level — changes outcomes, see our guide to braising, roasting, and steaming.
Common Heat Mistakes and How to Avoid Them
Most stovetop failures trace back to a handful of recurring errors. Recognizing them makes them easy to correct.
- Cranking the heat to make up for lost time. High heat does not speed most cooking — it burns the outside while leaving the inside undercooked. Plan time into your cooking instead.
- Not preheating the pan before adding food. Adding food to a cold or barely warm pan causes sticking and uneven cooking. Preheat on medium for 1–3 minutes before fat goes in.
- Moving food too soon. When searing, food will release naturally from the pan when it has developed a proper crust. If it sticks, it is not ready. Wait another 30–60 seconds before trying again.
- Ignoring carry-over heat. Pans — especially cast iron — retain heat after the burner is turned off. Remove food slightly before it looks done if you're finishing off-heat.
- Using one heat setting for everything. A recipe involving both a sauce and a protein rarely benefits from a single dial position throughout. Adjust actively as each element needs it.
Developing your heat instincts is part of the same continuous learning loop as tasting as you go — both habits ask you to engage with what is actually happening in the pan, not just follow instructions passively.

Author
Food & Drinks Editorial Team
Food & Drinks Editorial Team is the collective byline for our editorial team and contributor network. Articles published under this byline or an editorial pen name are researched, written, and reviewed according to our editorial standards for clarity, consistency, and independence before publication.
View all articles →