
Adding a Deck to Your Home: Structural, Permit, and Design Factors to Understand First
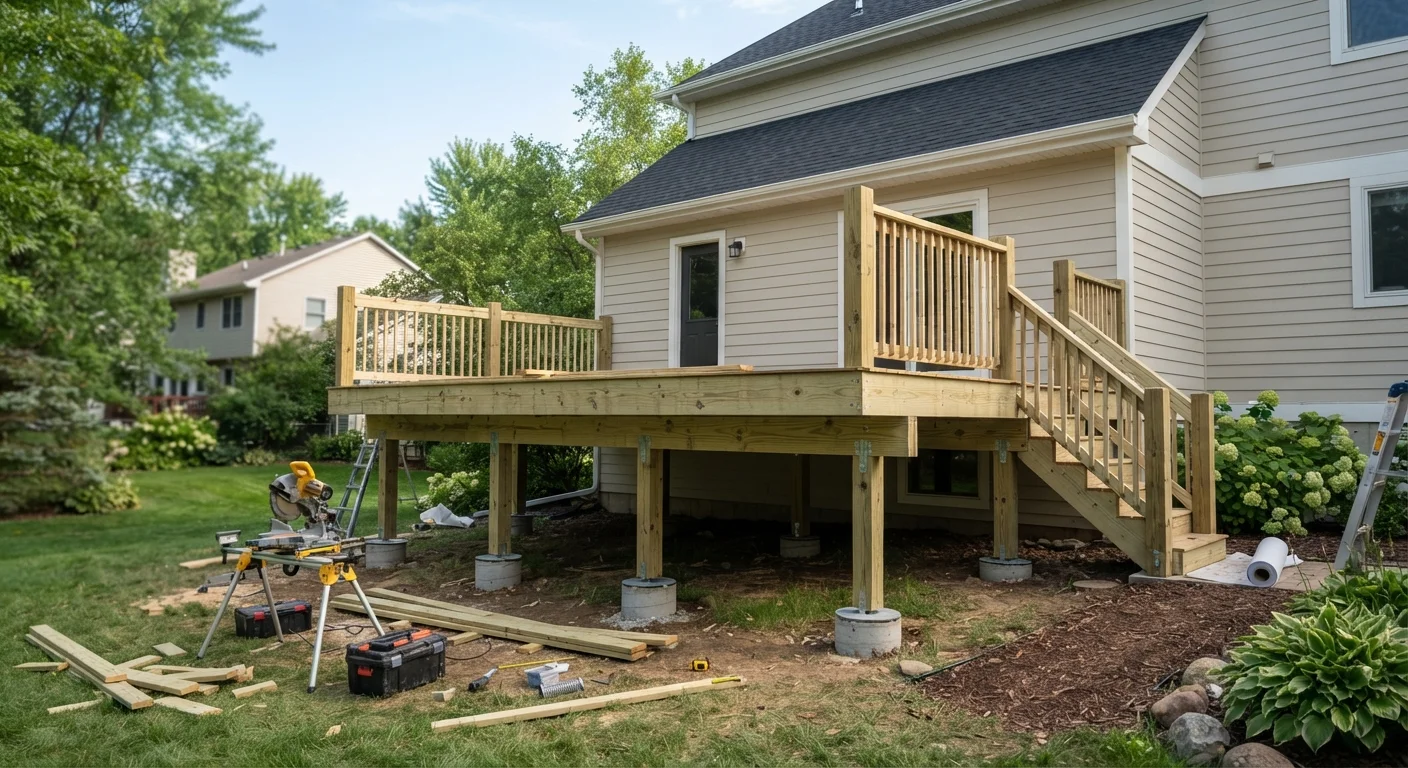
Photo credit: Glowwwatch.com
In this article
Before planning a deck, understand the structural requirements, local permitting norms, and design choices that affect safety and longevity.
Key Takeaways
- Most attached decks require a building permit and must meet local residential building codes.
- Footing depth, ledger board attachment, and load calculations are critical structural factors.
- Deck design choices — size, material, and height — directly affect cost, safety, and maintenance.
- Hiring a licensed contractor is strongly recommended for structural and elevated deck work.
- Skipping permits can create legal, insurance, and resale complications for homeowners.
Why Deck Projects Require More Planning Than Most Homeowners Expect
A deck feels like a straightforward addition — lumber, a few posts, and some screws — but it's one of the more structurally involved projects a homeowner can undertake. Decks are permanent structures attached to (or adjacent to) your home, subject to live loads from people and furniture and weather stresses from wind, snow, and moisture over time.
Because of these demands, nearly every US municipality treats deck construction as regulated work requiring permits, inspections, and compliance with residential building codes. Those requirements exist to protect you: documented failures in deck construction almost always trace back to inadequate footings, faulty ledger connections, or undersized framing members.
Permits Are Not Optional
In most US jurisdictions, adding an attached deck requires a building permit before any work begins. Building without a permit can result in fines, forced removal, and complications when selling your home. Always verify requirements with your local building department before starting any deck project.
Understanding the key structural, permitting, and design factors before you engage a contractor — or pick up a single board — puts you in a far stronger position to make smart decisions, ask the right questions, and avoid costly mistakes. If you're also planning outdoor improvements nearby, our garden planning guide covers how to assess your yard before committing to any layout changes.
The Core Factors to Work Through Before Building
Getting a deck built well involves coordinating several interdependent decisions. Use the steps below as a structured framework for working through them in the right order.
What you will need
You'll also benefit from having a few basic tools and documents on hand before your first contractor conversation.
Property Survey or Plat Map
Confirms exact property boundaries so the deck placement respects required setbacks from lot lines.
Soil Probe or Soil Report
Helps determine soil bearing capacity, which informs footing size and depth requirements.
Tape Measure
Used to mark and verify deck dimensions, clearances, and distances from the house and property lines.
Graph Paper or Design Software
Allows you to sketch deck layouts to scale before committing to a plan with a contractor.
Research Local Permit and Zoning Requirements
Before sketching a single layout, contact your local building department or visit their website. Confirm whether a permit is required (it almost always is for attached or elevated decks), what drawings or specifications must be submitted, and what inspections will be needed during construction.
Also check your local zoning code for setback requirements — minimum distances the deck must maintain from property lines, utility easements, and the main structure. HOA rules, if applicable, may add further restrictions on size, materials, or appearance.
Assess the Structural Attachment Point
For decks attached to the house, the ledger board — the horizontal beam bolted to your home's rim joist or band joist — is the most structurally critical element. Improper ledger connections are a leading cause of deck failures.
Have a licensed contractor or structural engineer inspect the attachment point before planning. They'll evaluate whether your home's framing can support the added load, whether flashing is needed to prevent water intrusion, and what fastener specifications are required by code.
Determine Footing Requirements
Deck footings anchor the structure to the ground and transfer its load safely into the soil. Two key factors govern footing design: frost depth and soil bearing capacity.
In cold climates, footings must extend below the frost line — the depth at which soil freezes — to prevent heaving. Your local building department will specify the required frost depth for your area. Soil type determines how large each footing must be to distribute weight without settling. Sandy or clay soils may require larger or deeper footings than firm, compacted ground.
Choose Your Deck Size and Layout
Deck size affects both cost and structural complexity. A general planning principle is to size the deck to accommodate its primary use — outdoor dining typically requires more square footage than a simple seating nook. Larger decks also require more posts, larger beams, and potentially more footings.
Consider access points (doors and stairs), traffic flow, sun exposure, and privacy when planning the layout. Elevated decks — those more than 30 inches above grade — require guardrails by code and involve greater structural complexity. Freestanding decks that don't attach to the house are a design alternative that avoids ledger attachment but still requires footings and permits.
Select Decking Materials With Longevity in Mind
Common decking materials include pressure-treated lumber, composite decking (wood fiber and plastic blend), hardwoods, and PVC. Each has trade-offs in upfront cost, maintenance needs, and lifespan.
- Pressure-treated lumber is widely available and cost-effective but requires periodic sealing and is prone to warping if not properly maintained.
- Composite decking resists moisture and insects and needs minimal maintenance, but carries a higher initial cost.
- Hardwoods (such as ipe or tropical species) are dense and durable but can be expensive and require specific fastening methods.
- PVC decking is moisture-resistant and low maintenance but can feel less natural underfoot.
Your climate, budget, and willingness to maintain the surface over time should guide this decision.
Hire Qualified Help and Finalize the Plan
Once you understand the structural, permit, and design requirements, decide how to proceed with construction. For most attached or elevated decks, working with a licensed contractor who has verifiable deck-building experience is strongly advisable. Ask for references, confirm licensing and insurance, and ensure the contractor pulls the permit in your jurisdiction — never agree to unpermitted work.
For a broader guide on evaluating which home projects require professional help, see our DIY vs. licensed contractor guide. Before any construction starts, use a pre-renovation checklist to confirm your budget, contractor vetting, and permit status are all in order.
Talk to Your Local Building Department Early
Building departments are public resources — many will answer general questions about setbacks, footing requirements, and the permit process before you've hired anyone. A 15-minute conversation or website review can save weeks of redesign later.
Elevated and Attached Decks Carry Real Risk
Deck collapses are a documented cause of serious injury in the US, most often tied to improper ledger board connections or undersized footings. Any deck attached to your home's structure or elevated more than 30 inches above grade should be designed and built by a licensed contractor who can ensure code compliance and structural integrity.

Author
Home & Garden Editorial Team
Home & Garden Editorial Team is the collective byline for our editorial team and contributor network. Articles published under this byline or an editorial pen name are researched, written, and reviewed according to our editorial standards for clarity, consistency, and independence before publication.
View all articles →